

How To Repair A Tobacco Pipe Bowl
Pipe forums and other discussion groups are full of posts asking about crack repairs, peculiarly to pipe bowls. Bowl cracks are generally the result of either accident, abuse or fail – adventitious drops or impacts can crack the wood, equally tin can outright abuse similar whacking the pipe confronting a difficult surface to knock dottle out of the bowl. Cracks caused by fail are usually due to a failure to maintain the level of cake (carbon buildup) inside the tobacco chamber.
Block forms on the walls of the chamber when the pipe is smoked. Tars, ash  and carbon combine to form a dense, heat resistant layer that is actually beneficial to the briar pipe upwardly to a point. The platonic cake thickness is almost the thickness of a dime, at which bespeak it adds a layer of insulation to the tobacco chamber that helps protect the briar walls from burnouts. Too much block impinges on the smoking ability of the pipe and can pose a serious threat to its structural integrity. This is because cake expands and contracts at a different rate than the briar of the chamber walls, and, if allowed to build up past the recommended point, tin can employ enough outward force per unit area on the tobacco bedroom to crack the briar clean through.
If the scissure does non penetrate the chamber wall and/or is tightly clamped together, it is often possible to issue a long-lasting repair by sealing the crevice with CA glue on the exterior of the bowl or JB Weld or basic pipe mud (cigar ash and water) on the interior of the tobacco chamber. If even so, the crack goes all the way through the chamber wall and is mobile (ie the fissure can be flexed open and closed), it may be necessary to add physical support to the repair to ensure a solid and permanent repair. Pipers are used to seeing shank bands of nickel, silverish or even gold used to reinforce a scissure in a pipage'south shank, just nigh folks don't want to wrap a metal band effectually a pipe bowl. Here is where crack pinning comes into the piping repair repertoire.
Pinning is a method of crack repair shrouded in mystery and really but mentioned online in lists of repairs available at a few shops past skilled craftsmen. Information technology does require a few specialized tools and a steady mitt, only pinning should non, in my opinion, be regarded as outside the scope of a home repair or restoration. If yous're relatively handy and have a few dozen pipe restorations under your belt, I encourage y'all to button the boundaries a bit. If, on the other paw, you're all the same nervous well-nigh performing a ream & clean, you lot're probably not ready to tackle pinning. And equally with all new repair skills, I think information technology wise to exercise on a few junker pipes before aiming your drill at that vintage Peterson or Dunhill.
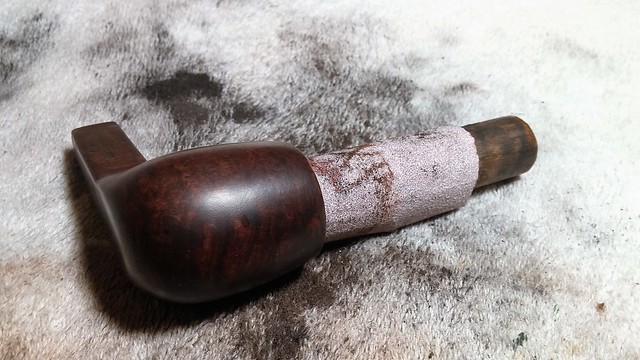
The patient for this pinning tutorial is a stummel made past GBD for Poor Richard's, a tobacco shop in Bozeman, Montana. The original owner had neglected the cake buildup in his piping to the point where the cake had literally dissever the bowl nearly in one-half, with cracks at the front and rear of the bowl. I could see the cracks opening and endmost just by squeezing the bowl in my hand. Not practiced!


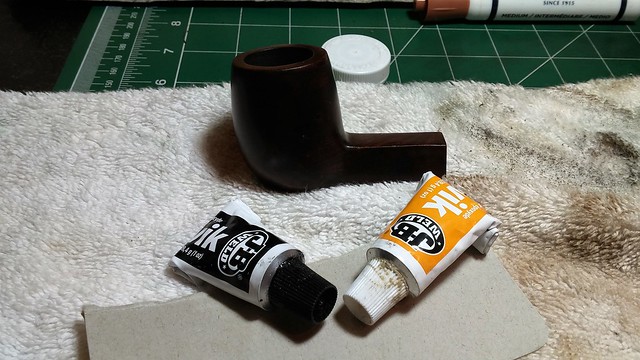
I gathered up a few tools and supplies:
-
a i.2mm micro drill flake
-
a variable speed electrical manus drill
- a length of ane.2mm contumely rod
- wire cutters
- 220-grit sandpaper
- CA glue
- a marker
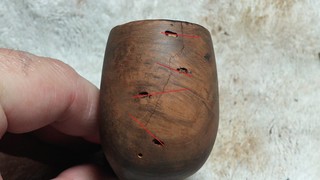
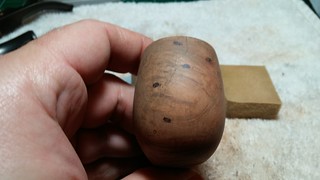
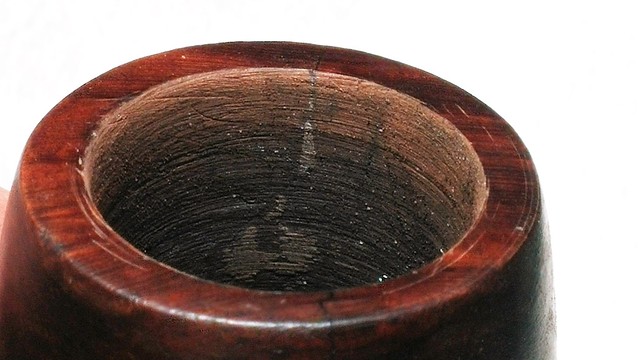
To cease the cracks from spreading further, I first drilled "stop cap" holes at the terminal ends of each crack, careful not to punch through the sleeping accommodation walls. The forepart crack was uncomplicated enough, merely the rear crack had "spidered", spreading sparse, running cracks in all directions across the briar. I tracked each spider crack and drilled an end cap pigsty for each one.
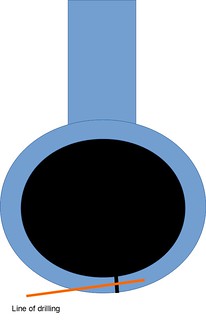
To pivot the cracks, information technology is necessary to drill pivot shafts across the crack, through the curved walls of the bowl, without drilling into the chamber. This graphic shows the line of drilling. To minimize the number of holes I'd need to fill up afterward, I opted for "blind pinning", in which I stopped the pin shaft before information technology broke through the briar surface again.
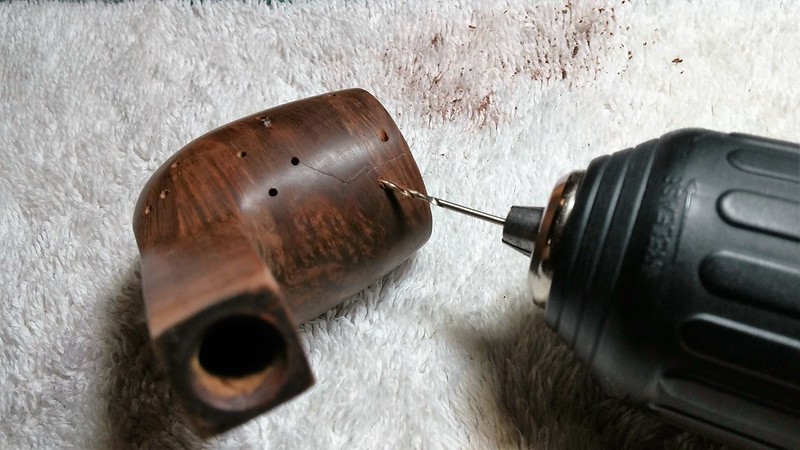
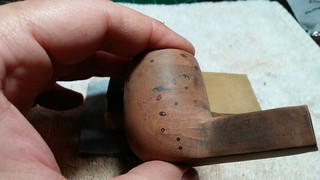
This close-upwardly pic shows the flat angle at which I drilled, and the brass rod in position. I marked the rod length and then cut information technology a bit short so that when fully seated in the shaft, the outer end of the rod would be below the outer surface of the briar. I roughed upwardly the brass pin with 220-grit sandpaper to give the glue more than gripping surface, then ran a drop of CA mucilage into the shaft before pushing the pin home.
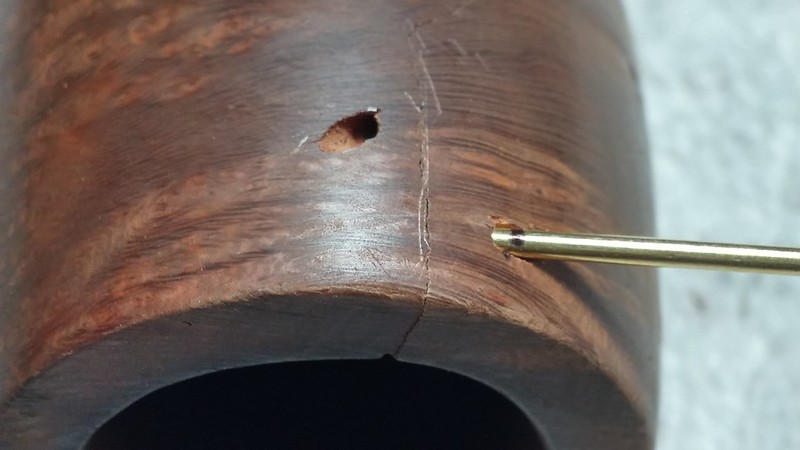
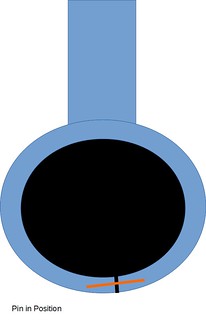
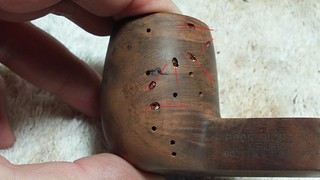
Sharp-eyed readers will besides take noticed that the second shaft had been drilled when I took the movie above. Notation the angle of this shaft relative to the first ane – it'southward not even shut to parallel. This is deliberate. Each pivot should be drilled at an opposing angle to its neighbours. This way any move of the briar as it heats and cools volition be blocked by i or more pins. If the pins were parallel, force per unit area in the wrong direction could push the crack open again. Here are pics of the front and rear cracks after pinning. The red lines show the management of the pivot shafts. You tin see how the pins work to stitch the crack shut. The front end repair doesn't look as well bad, but the rear of the basin looks like it was attacked by termites!
After letting the glue cure, I am happy to report that I can no longer brand the cracks move no matter how hard I squeeze the bowl. That's a very good sign, every bit it shows that the bowl is acting as a single piece of briar instead of several bits of loosely continued forest.
With the bowl structurally sound once more, information technology was time to sort out the damage inflicted on the stummel by some bedlamite with a drill. I patched over all 17 (!!) holes with CA and briar dust and let the CA cure before filing and sanding the fills flush with the surface of the briar.
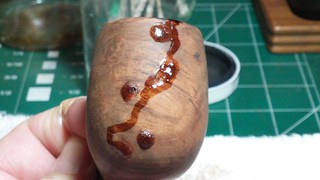

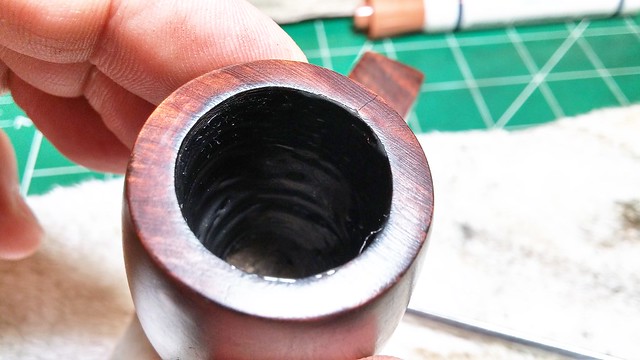
At this bespeak, you tin can sit down back and congratulate yourself – the difficult work is done! But before refinishing the stummel, take the time to fill the cracks on the interior of the bowl. Many pipe repairmen use traditional pipe mud (cigar ash and h2o) for interior sleeping accommodation repairs, only in this case I elected to fill and reinforce the interior repairs by pressing JB Weld into the cracks. There was also a spot on the forepart chamber wall that looked suspiciously similar the beginnings of a burnout that I filled in the same way. I let the JB cure and so sanded out the excess epoxy. This produced squeamish smooth sleeping room walls with JB Weld left only in the repaired areas. JB doesn't "breathe" like forest every bit it heats and cools, and then I think information technology's worth the endeavor to remove any epoxy that you don't need.
I finished off the repair with a bowl coating of activated charcoal powder and maple syrup. This blanket is largely cosmetic in this case, used to hide the JB, simply it volition provide an extra layer of protection for the repairs equally well equally a consistent surface upon which to build a new (and hopefully well-trimmed) layer of cake. You tin read my postal service on this useful bowl coating method here.
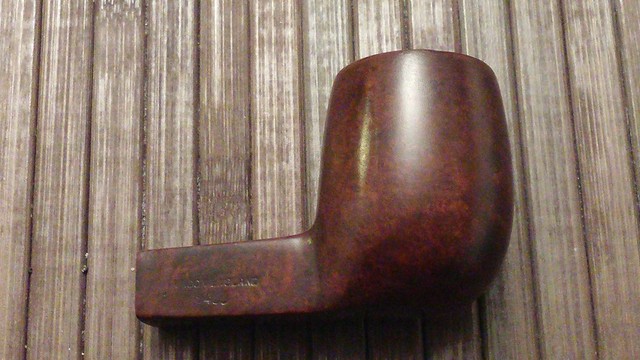
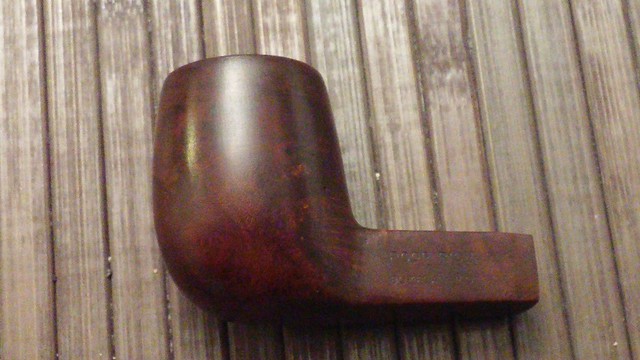
All that remains at this betoken is to refinish the stummel equally you similar. If your repair required a big number of fills, I recommend a dark stain every bit information technology hides the repairs better than a lighter finish. In this case, I went with a night dark-brown finish that masks the repairs well enough only nevertheless allows the grain of the briar to shine through. If you'd like to run into how the completed pipe turned out, you can check out the total restoration here on Reborn Pipes.
I hope this tutorial has demystified the pinning process and provided you with another useful repair technique and the inspiration to try it out the next time y'all come across a cracked bowl. I would put crack pinning up near the tiptop of the Piping Repair Food Chain, and then try to start this repair when you're rested and have an uninterrupted bridge of time in which to work. And, as with all repairs, remember to plan your work, have all the necessary tools and supplies at hand, and proceed carefully and patiently.
Thanks for joining me. Happy Pipe!

How To Repair A Tobacco Pipe Bowl,
Source: https://dadspipes.com/2016/03/08/a-crack-pinning-tutorial/
Posted by: hillcating.blogspot.com
0 Response to "How To Repair A Tobacco Pipe Bowl"
Post a Comment